Light a Musician Portrait Indoors: A Four-Point Setup for Clean, Controlled Studio Light
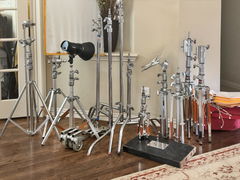
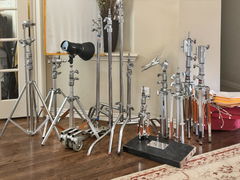
A professional studio portrait setup like this is the product of several deliberate decisions working together for a unified look and feel. This setup uses two lights and two pieces of light control to build a soft, dimensional look on our musician: a tube light camera-left providing direct, punchy illumination on the face, a 40"x40" silk diffusing a second light source to fill in shadows, and a flag positioned to prevent that same light from bouncing off the back wall. The backdrop, lighting, and grip gear are all rigged on C-stands, kit and roller stands, each one bagged and secured the way it should be on any set, to prevent tipping if/when accidental contact occurs. Below is everything used to build this look, broken down by what it does and why it's positioned where it is.
Portrait Shoot Equipment for Studios
- Regular price $119.00 USDUnit price
-
- Regular priceFrom $53.00 USDUnit price
-
- Regular priceFrom $47.00 USDUnit price
-

Junior Stand Double Riser Rolling
Regular price $706.00 USDUnit price20" C+Stand w/Turtle Base, Grip Head & Arm Chrome
Regular price $345.00 USDUnit price-
40" C-Stand w/Sliding Leg, Includes Grip Head & Arm Chrome
Regular priceFrom $315.00 USDUnit price-
- Regular priceFrom $83.00 USDUnit price
-
- Regular price $276.00 USDUnit price
-
- Regular price $100.00 USDUnit price
-
- Regular priceFrom $38.00 USDUnit price
-


Guide to This Musician Lighting Setup
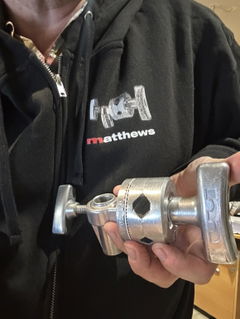
This setup uses four points of grip and lighting working together, each with a specific job. A tube light mounted in The Claw — a Matthews clamp with anti-crush, magnet-held jaws for fast, secure mounting — sits on a Medium Duty Kit Stand camera-left, providing a brighter, more direct light source on the musician's face. That stand is secured with a 10 lb BoaBag wrapped around the risers, which is enough counterweight for a stand rated to 20 lbs but weighing only 3 lbs itself — light enough to move quickly, stable enough to trust. The backdrop is held on a 40" C-Stand with grip head and arm, bagged on the tall leg and boomed out over it, which is standard practice for safety any time a boom setup is used. Camera-right, a 20" C-Stand holds a 40"x40" Artificial Silk, also bagged on the tall leg, softening and spreading the second light source for a gentler fill. Just behind it, a 40" C-Stand holds a 40"x40" flag — again bagged for safety — set up as negative fill to absorb light before it can bounce off the back wall and wash out the contrast. Finally, the key light itself is mounted on a Double Riser Junior Rolling Stand (PN H386022), with the ballast clamped directly onto the stand's riser. The rolling base is what makes this rig easy to work with: roll the light into position, then lock it back down. Straight-tracking casters mean the wheels stay aligned in the direction you push — a small detail, but one that separates a stand you can trust from one you're constantly fighting. Small shifts in positioning let you shape the mood of the final image.